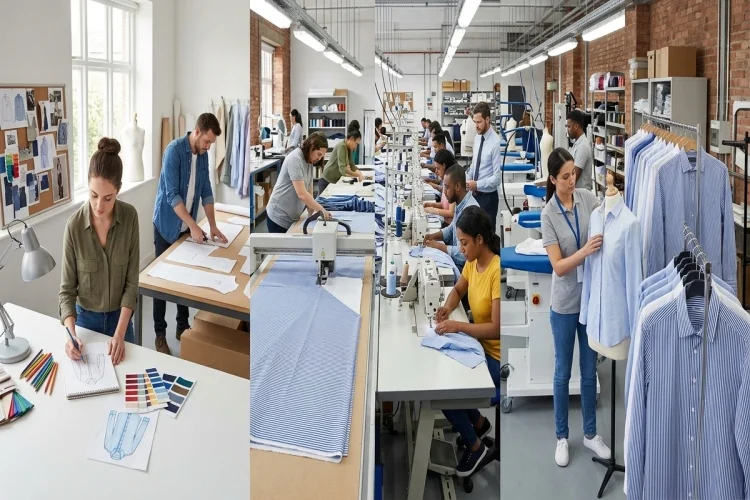
A shirt may look simple when it is hanging in a shop, but creating it involves far more than joining a few pieces of fabric.
Before that shirt reaches the rack, someone has researched the idea, drawn the design, selected the material, created a pattern, tested the fit, cut the fabric, sewn the pieces, and inspected the final result.
Learning how clothes are made from sketch to finished garment gives you a new appreciation for the work behind everyday fashion. It also explains why two apparently similar garments can differ so much in fit, comfort, durability, and price.
The exact process depends on the product. A basic T-shirt usually requires fewer components and construction steps than a tailored coat with a lining, pockets, buttons, and structured shoulders. Custom clothing also follows a different schedule from mass-produced apparel.
However, most garments move through the same basic stages. Here is how a creative idea gradually becomes something you can actually wear.
The Process Begins With an Idea
Every garment starts with a concept. A designer may be inspired by street style, historical clothing, architecture, nature, music, a particular fabric, or a practical customer need.
Before drawing, designers often research their target customer. They consider where the garment will be worn, how much it should cost, which season it belongs to, and what other pieces will appear in the collection.
A designer creating a summer travel shirt, for example, may prioritise lightweight material, practical pockets, easy movement, and colours that coordinate with several trousers. A designer working on eveningwear may focus more on shape, decoration, and dramatic fabric movement.
The first sketches can be loose and expressive. Their purpose is to capture the silhouette, proportions, colour ideas, and overall mood rather than explain every construction detail.
The Fashion Sketch Becomes a Technical Design
A creative drawing communicates the appearance of a garment, but a manufacturer needs much more precise information.
The design is therefore converted into a technical flat sketch. This shows the garment as though it were laid flat, usually from the front and back. Details such as seams, pockets, collars, fastenings, stitching, pleats, and panels are drawn clearly.
Technical designers help connect the creative idea with production. Their work may involve specification review, technical sketching, pattern development, live fittings, digital garment tools, and production planning.
Creating the Tech Pack
The technical sketch usually becomes part of a tech pack, short for technical package. This is the main instruction document shared with the pattern maker, sample room, suppliers, and factory.
A tech pack may contain garment drawings, measurements, fabric information, colours, stitching instructions, labels, trims, packaging details, and a bill of materials. It translates the designer’s visual idea into information that can be measured and reproduced.
Without clear specifications, different people may interpret the design differently. One person may imagine a narrow collar while another makes it wider, or a factory may use the wrong zip length. Accurate documentation reduces this guesswork.
Fabrics and Trims Are Selected
Next, the development team chooses the materials. The main fabric affects the garment’s weight, texture, movement, warmth, stretch, appearance, and care requirements.
A flowing dress might require viscose, silk, or lightweight polyester. A structured jacket may need wool, denim, canvas, or a fabric reinforced with interfacing.
The team also selects trims, meaning the additional components used to complete the garment. These can include buttons, zips, elastic, thread, lining, labels, hooks, drawstrings, and decorative details.
Small material choices can create major differences. A heavy metal zip may distort a delicate fabric, while weak thread can reduce the durability of an otherwise strong pair of trousers.
Fabric is normally checked for colour, drape, surface feel, durability, consistency, and visible defects before production begins.
Patternmakers Turn the Design Into Shapes
A garment cannot be cut directly from the original fashion sketch. It needs a pattern.
A pattern is a set of flat shapes representing the different parts of the garment. A simple shirt pattern might include separate pieces for the front, back, sleeves, collar, cuffs, and pockets.
Patternmakers use measurements, garment specifications, and construction knowledge to create these shapes. Patterns can be drafted manually on paper, developed by draping fabric on a dress form, or produced with computer-aided design software.
Fashion Institute of Technology training connects patternmaking with draping, marker making, sample production, measurement specifications, and industrial production methods.
The pattern also includes practical information such as grainlines, notches, seam allowances, fold lines, and placement marks. These symbols help cutters and sewing operators position and assemble every component correctly.
Grading the Sizes
Once the base pattern is approved, it can be graded into additional sizes. Grading does not simply enlarge every part by the same percentage.
Different areas must increase or decrease according to an established size system. The shoulder, chest, waist, sleeve, and garment length may all change by different amounts.
This stage helps a single design become a complete size range while maintaining its intended proportions.
Samples Are Made and Fitted
Before hundreds or thousands of garments are produced, the factory or sample room creates a prototype.
The first sample allows the team to see how the two-dimensional sketch and pattern behave as a real three-dimensional object. They can examine the silhouette, construction, fabric choice, proportions, and overall appearance.
A fit sample is then tried on a fit model, dress form, or digital avatar. The technical designer checks areas such as shoulder position, sleeve length, chest room, waist placement, balance, and freedom of movement.
The team records any problems and updates the pattern or tech pack. A sleeve may need more room, a pocket may sit too low, or the fabric may not drape as expected. Sampling can go through several revisions before the design is approved.
Modern apparel development may also use 3D garment simulation to test pattern, colour, texture, fit, and design changes before producing every physical version.
Fabric Is Prepared, Arranged, and Cut
After approval, the factory prepares for bulk production.
Fabric may first be inspected, relaxed, or tested for problems such as shrinkage and skewing. Shrinkage can be affected by fibre, yarn, fabric construction, wet processing, finishing, sewing, and garment care.
The approved pattern pieces are then arranged into a marker. A marker is a layout showing how the pieces should be positioned across the fabric while respecting grain direction, size quantities, and print placement.
Efficient marker planning matters because poor placement wastes material. In the cutting room, fabric may be spread in several layers before being cut manually or by automated equipment.
The cut pieces are sorted and bundled. Matching marks and identification tickets help ensure that sleeves, collars, fronts, and backs from the correct size and fabric layer stay together.
Sewing Turns the Pieces Into a Garment
The bundles move to the sewing area, where the flat fabric pieces finally begin to look like clothing.
Garments are generally assembled in a planned order. A shirt factory might prepare pockets and collars first, join the shoulders, attach the sleeves, close the side seams, and finish the cuffs and hem.
Different machines may perform specialised tasks. One creates straight seams, another finishes raw edges, and another makes buttonholes.
Apparel manufacturing uses numerous stitch and seam types because different areas require different levels of strength, stretch, flexibility, or decoration.
In large factories, operators may each complete one repeated operation before passing the garment to the next station. The broader production flow commonly includes cutting, sewing, assembly, quality control, and packaging.
A made-to-measure studio may work differently, with one tailor completing a larger portion of the garment.
Finishing Adds the Final Appearance
A garment is not necessarily complete when the sewing stops.
Loose threads may be trimmed, seams pressed, buttons attached, labels added, and hems checked. Depending on the desired look, the finished garment may also be washed, softened, dyed, steamed, or treated.
Denim provides a familiar example. Jeans can be washed, treated with enzymes, softened, dried, inspected, and pressed to achieve a particular colour and texture.
Pressing is especially important because it shapes seams and gives the garment a clean presentation. A poorly pressed shirt can look unfinished even when its stitching is technically correct.
The exact finishing process depends on the material and design. A wool coat, printed T-shirt, silk blouse, and distressed pair of jeans all require different treatments.
Quality Control Checks the Finished Product
Quality control can happen at several stages rather than only at the end. Fabric, cutting accuracy, stitching, measurements, and finishing may all be checked during production.
Inspectors look for problems such as skipped stitches, uneven seams, stains, holes, broken fasteners, incorrect labels, mismatched colours, or measurements outside the approved tolerance.
Garment quality is commonly evaluated through factors including fit and seam integrity, while fabric quality affects the result from the beginning.
Some garments may also undergo performance testing. Depending on the product, testing can examine shrinkage, colourfastness, stretch, seam strength, water resistance, or other characteristics.
Approved items are pressed or folded, fitted with tags, placed in protective packaging, packed into cartons, and prepared for shipment to warehouses or retailers.
The journey from sketch to finished garment combines creativity, technical knowledge, skilled labour, machinery, communication, and quality control.
A designer begins with an idea, but patternmakers, technical designers, material suppliers, cutters, sewing operators, finishers, and inspectors are all needed to turn it into wearable clothing.
Each decision affects the result. Fabric influences movement, patterns control fit, stitching creates structure, and finishing gives the garment its final appearance.
The next time you pick up a shirt or jacket, look closely at its seams, pattern pieces, labels, fastenings, and finishing.
Thinking about the many stages behind it can help you recognise better construction, make more informed purchases, and appreciate the people and skills involved in creating your clothes.