Buying clothes online can sometimes feel like a guessing game. A medium from one brand fits perfectly, while another brand’s medium feels completely different. Even size labels such as 32, 10, or XL do not always tell you exactly how a garment will fit.
That is why knowing your actual measurements can be incredibly useful.
Learning how to take accurate body measurements at home can help you compare yourself with clothing size charts, choose sewing patterns, communicate with a tailor, and reduce the chance of ordering something that does not fit.
The good news is that you do not need professional equipment. A flexible measuring tape, a mirror, and a few minutes are usually enough.
The important part is knowing where to place the tape and keeping your measuring technique consistent. Even a small difference in tape position can change the result.
This guide walks you through the essential measurements, explains common mistakes, and shows you how to record numbers that are actually useful when shopping or making clothes.
1. Prepare Before You Start Measuring
The first rule is simple: do not measure over bulky clothing.
Ideally, wear close-fitting clothes or the undergarments you would normally wear underneath the type of garment you are measuring for. Simplicity recommends measuring over your usual undergarments and keeping the tape comfortably snug rather than tight.
You will need a flexible sewing tape measure. A rigid construction tape is not suitable because it cannot follow the curves of the body accurately. Mood Fabrics similarly recommends a soft, flexible tape for body measurements.
Stand naturally with your feet in a comfortable position. Avoid sucking in your stomach, pushing your chest forward, or standing unusually straight just because you are being measured.
You want numbers that represent your normal body position.
A full-length mirror can help you check whether the tape is level. If possible, ask another person to assist with difficult measurements such as shoulder width or back length.
2. How to Measure Your Chest or Bust Correctly
Chest or bust circumference is one of the most important measurements for shirts, jackets, dresses, coats, and fitted tops.
Wrap the measuring tape around the fullest part of your chest or bust. Bring it across your back while keeping the tape as level as possible.
The tape should touch your body without squeezing it.
Simplicity describes the bust measurement as running around the fullest area and straight across the back, while Mood Fabrics likewise recommends measuring around the widest point.
Breathe normally while taking the measurement.
If you pull the tape very tightly while exhaling, you may record a number that is smaller than your realistic clothing requirement.
For certain sewing patterns, you may also need a high bust or underbust measurment. These additional numbers help when fitting more structured garments.
Record everything immediately rather than assuming you will remember later.
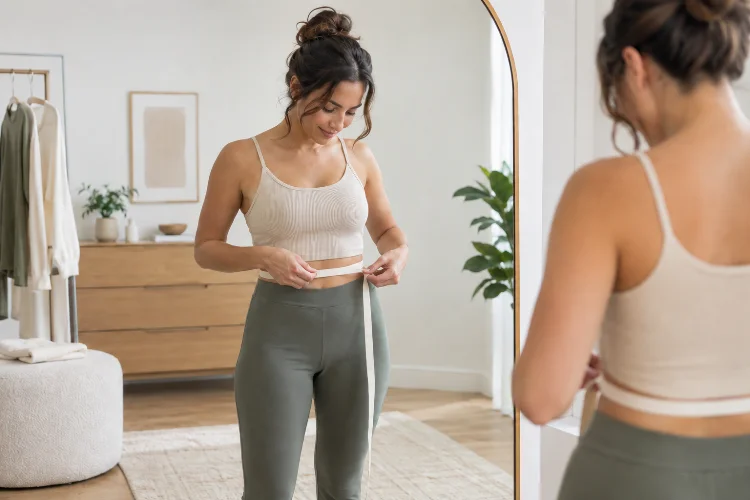
3. Find Your Natural Waist Instead of Guessing
Your natural waist is not necessarily where the waistband of your favorite jeans sits.
It is generally the natural narrowing or crease of your torso. One easy method is to bend gently to one side and notice where your body naturally folds.
Wrap the tape around this area while keeping it parallel to the floor.
Do not pull your stomach inward.
Simplicity suggests tying a narrow piece of elastic around the waist and allowing it to settle naturally before measuring. This can be particularly helpful when taking several related measurements.
Keep the tape close but confortable.
If you are measuring specifically for pants that sit considerably lower than your natural waist, you may also want to record the circumference at the actual waistband position.
Keeping these as seperate measurements prevents confusion later.
4. Measure Your Hips at the Fullest Point
Hip measurement is another area where people often place the tape too high.
Your hip circumference should usually include the fullest part of your hips and seat rather than simply measuring around the hip bones.
Stand naturally and wrap the tape around the widest point.
Check yourself from the side in a mirror to make sure the tape is not riding upward or dipping downward across the back.
Nordstrom’s sizing guidance recommends measuring around the fullest part of the hips and rear while keeping the tape level.
Do not assume that everyone’s fullest hip point is located the same distance below the waist.
Simplicity notes that it is often roughly 7–9 inches below the waist, but individual proportions vary.
Finding your actual fullest point is more useful than following a fixed number.
5. Measure Your Shoulders, Neck, and Arms
Upper-body measurements become particularly useful when buying tailored shirts, jackets, coats, or sewing fitted garments.
For shoulder width, measure across the back from the edge of one shoulder to the other. The points should roughly correspond to where a well-fitting shoulder seam would end.
This measurement is easier with help because reaching behind yourself can alter your posture.
Seamwork notes that shoulder measurements can be important for fitted bodices and garments with sleeves because the position of the shoulder seam affects overall fit and mobility.
For your neck circumference, place the tape around the base of your neck without pulling tightly.
To measure arm length, start near the shoulder point and run the tape down toward your wrist. Slightly bending your elbow can create a more realistic measurement for garments that require movement.
You may also need your upper-arm circumference, especially for fitted sleeves. Measure around the fullest part of your upper arm while keeping the muscles relaxed.
6. Measure Your Inseam for Better-Fitting Pants
If pants regularly feel too long or too short, your inseam is one of the most useful numbers to know.
The inseam runs from the crotch down the inside of the leg toward the ankle or desired trouser hem.
Levi’s recommends measuring from the upper inner leg down toward the ankle to determine appropriate jean length.
For better accuracy, have someone else take this measurement while you stand naturally.
Another option is to use a pair of pants that already fits you well.
Lay the pants flat and measure along the inside seam from the crotch intersection to the hem. Levi’s also suggests this method when using an existing pair of jeans to determine a preferred inseam length.
Keep in mind that desired trouser length can vary depending on the style.
Cropped trousers, full-length wide-leg pants, and formal trousers may all require slightly different finished lengths even though your body measurement remains the same.
7. Do Not Forget Torso and Back Length
Circumference measurements get most of the attention, but vertical measurements can be just as important.
Back waist length is typically measured from the prominent bone near the base of the neck down to the natural waist.
This can reveal why a shirt, dress, or jacket seems to sit too high or too low even when the chest and waist measurements appear correct.
Simplicity includes back waist length as an important body measurement for assessing figure proportions and pattern fit.
People with the same height can have very different proportions.
One person may have relatively long legs and a short torso, while another person of identical height may have a longer torso and shorter legs. Seamwork points out that height alone does not determine where pattern adjustments may be needed.
This is why detailed measurements can be more informative than height or clothing size alone.
8. Repeat Measurements to Catch Simple Mistakes
One of the easiest ways to improve accuracy is to measure twice.
If your first waist measurement is 31 inches and your second is 33 inches, something probably changed.
Check the tape position and take the measurement again.
Make sure the tape has not twisted. For chest, waist, and hip measurements, check that it remains roughly parallel to the floor.
Seamwork recommends using tools such as a flexible tape, paper, pencil, and mirror or helper when recording measurements accurately.
Try to use the same measuring technique every time.
Body measurements can change naturally, but inconsistant technique can make those changes appear larger than they really are.
It is also useful to record the date next to your numbers.
If you shop online regularly or sew clothing, checking your measurements periodically can help ensure that your saved numbers are still useful.
9. Understand That Body Measurements Are Not Garment Measurements
This distinction can prevent a lot of sizing mistakes.
Your body measurement describes your physical dimensions. A garment measurement describes the dimensions of the finished item.
They usually are not supposed to be identical.
Clothes often require additional room for movement, comfort, and design. In sewing, this extra space is commonly called ease.
Seamwork explains that finished garment measurements are often larger than body measurements because additional room is needed for movement. Stretch garments can sometimes use negative ease because the material expands when worn.
This means a 38-inch chest does not automatically mean you should buy a shirt with an exact 38-inch garment circumference.
Always check the brand’s size chart and, when available, its finished garment measurements.
Simplicity also advises comparing both body measurements and finished garment dimensions when selecting a sewing pattern size.
10. Keep a Personal Measurement Record
Once you have taken everything carefully, save the numbers somewhere easy to access.
You might record chest or bust, waist, hips, shoulders, neck, arm length, upper arm, inseam, and back waist length.
Your phone’s notes app works perfectly.
This becomes especially useful when shopping online because you can compare your actual measurements with different brand size charts instead of relying entirely on labels such as S, M, L, or XL.
Do not be surprised if you need different sizes from different companies.
Size labels are not completely standardized across the clothing industry, and sewing pattern sizes may also differ from ready-to-wear sizing. Simplicity specifically advises choosing pattern sizes from body measurements rather than assuming they match store-bought clothing sizes.
Think of your measurements as practical data, not as a judgment about your body.
Their job is simply to help clothes fit better.
Knowing how to take accurate body measurements at home can make shopping, tailoring, and sewing considerably easier.
Start with a flexible tape, wear minimal or close-fitting clothing, and stand naturally. Carefully measure important areas such as your chest or bust, natural waist, hips, shoulders, arms, torso, and inseam while keeping the tape level and comfortably snug.
Most importantly, measure twice and record your numbers.
Do not rely entirely on the size printed on a clothing label. Compare your measurements with each brand’s size chart and remember that finished garments often include additional room for comfort and movement.
Spend ten minutes creating your personal measurement record today. The next time you shop online or visit a tailor, those simple numbers could save you from a lot of fitting frustration.