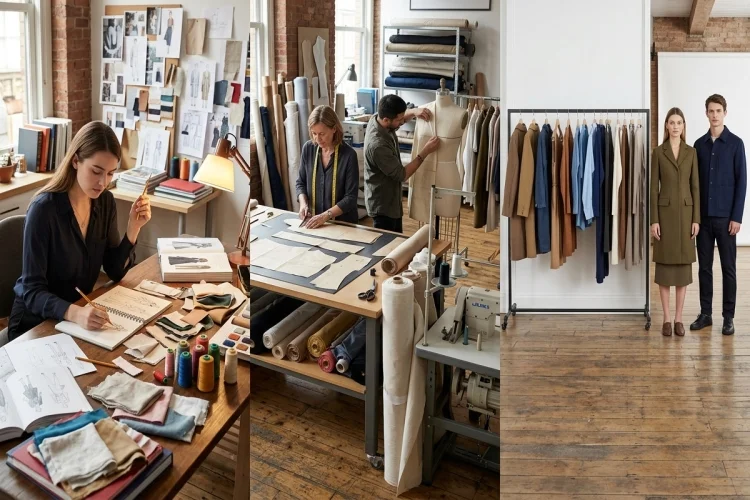
A finished fashion collection may look effortless on a runway or clothing rack, but every garment begins with a long series of decisions.
Before fabric is cut, a designer must understand the customer, develop a concept, explore silhouettes, select materials, and decide how the garment should function.
The basic stages of fashion design combine creativity with technical problem-solving. A beautiful sketch is only the beginning. The idea must eventually become a wearable product with the right fit, construction, cost, and visual identity.
The exact process varies between independent designers, couture studios, and large fashion companies. Some designers begin by drawing, while others start by draping fabric directly on a dress form. Digital tools may also replace parts of the traditional sampling process.
Still, most fashion projects follow a similar journey: research, concept development, sketching, material selection, patternmaking, sampling, fitting, and final presentation. Understanding these stages helps beginners see fashion design as more than simply drawing attractive clothes.
Stage 1: Research the Market and Define the Brief
Fashion design usually begins with research. The designer needs to understand what they are creating, who will wear it, and why the product should exist.
A design brief might describe the target customer, season, price range, garment category, colour direction, and practical requirements. For example, a collection for young professionals may need comfortable office clothing that can also work for casual evening plans.
Designers may study historical clothing, art, architecture, street style, films, social trends, museum collections, and competing brands. FIT describes fashion design education as combining market research with inspiration from art, history, and culture.
Good research should lead to useful design decisions. Saving hundreds of random images is less helpful than identifying repeated ideas, such as curved silhouettes, natural textures, modular clothing, or a specific cultural reference.
Stage 2: Create a Concept and Mood Board
Once the research has a clear direction, the designer turns it into a visual concept. A mood board brings together images, materials, colours, shapes, textures, and words that communicate the desired atmosphere.
The concept could be based on a place, memory, social issue, historical period, or practical problem. A coastal-inspired collection might use faded blue, sandy beige, lightweight layers, rope details, and flowing silhouettes.
A mood board should not simply be a collection of pretty pictures. Every image needs to support the overall design story.
FIT materials on fashion presentation connect mood boards with fabric choices, design details, silhouettes, colour theory, and the development of coordinated design groups.
Build a Colour and Fabric Direction
At this stage, the designer usually begins narrowing the colour palette. Choosing four or five main shades can make a collection feel more consistent than using unrelated colours in every look.
Initial fabric ideas may also appear on the board. Rough linen suggests a different mood from glossy satin, even when both materials use the same colour.
Stage 3: Sketch and Develop the Designs
The next stage is turning the concept into garment ideas. Designers often begin with quick sketches rather than polished illustrations.
These rough drawings allow them to test different necklines, sleeves, lengths, proportions, and styling combinations. One jacket idea may produce ten variations before the strongest version is selected.
Fashion sketches show the overall silhouette and mood of a garment. They may exaggerate proportions to communicate movement or attitude, so they are not always precise manufacturing instructions.
FIT fashion-design courses teach sketching alongside fabric rendering, garment details, silhouette development, patternmaking, draping, and construction. This reflects the difference between drawing an idea and developing something that can actually be made.
Beginners should focus on exploration rather than perfect drawing. A simple sketch that clearly shows shape, seams, and proportions can be more useful than a beautiful illustration with unclear construction.
Stage 4: Select Fabrics, Colours, and Trims
A design can change completely when it is made in a different fabric. A wide skirt created in stiff cotton will hold its shape, while the same pattern made from viscose may fall softly around the body.
Designers consider weight, stretch, texture, transparency, drape, durability, care requirements, availability, and cost. They may request fabric swatches from mills or suppliers and test several options before making a final choice.
Trims are the additional components used in a garment, including buttons, zips, thread, elastic, lining, labels, hooks, and decorative details. These elements should suit both the appearance and function of the design.
CottonWorks provides material libraries and product-development resources specifically to help designers compare constructions, finishes, yarns, prints, and performance features.
Colour may also require a lab-dip approval process to ensure the final dyed material matches the intended shade.
A practical designer does not choose fabric only because it looks attractive. They also ask whether it will sew properly, remain within budget, and perform well during wear.
Stage 5: Produce Technical Flats and a Tech Pack
After the creative direction is approved, the design needs to be communicated clearly to patternmakers, sample makers, and manufacturers.
A technical flat is a precise drawing of a garment shown from the front, back, and sometimes the side. Unlike a fashion illustration, it focuses on seams, pockets, closures, stitching, panels, and other construction details.
The flat usually becomes part of a tech pack. This document can include measurements, fabric specifications, colour codes, trims, label placement, stitching instructions, construction notes, size ranges, and a bill of materials.
Tech packs act as detailed instructions for turning a design into a consistent garment. FIT technical-design training follows products through pattern development, construction, fitting, and the creation of technical specification packages.
Clear documentation reduces misunderstandings. Without it, a factory may use the wrong pocket size, seam finish, button placement, or garment length.
Stage 6: Create the Pattern or Drape the Design
A pattern is the two-dimensional blueprint used to cut the garment pieces from fabric. It translates a three-dimensional clothing idea into shapes that can be sewn together.
Patternmakers may begin with a basic block and modify it to create the required silhouette. They add shaping through darts, seams, pleats, gathers, or extra volume.
Another method is draping. The designer pins and shapes fabric directly on a dress form, making it useful for exploring unusual volumes or fluid designs. The draped fabric can later be converted into paper or digital pattern pieces.
FIT patternmaking courses connect specifications with pattern development, draping, garment measurements, sample production, and fit. CottonWorks similarly describes pattern drafting as a starting point for garment construction based on body or fit-model measurements.
Patternmaking requires accuracy. A difference of only a few centimetres can affect balance, movement, seam alignment, and comfort.
Stage 7: Make a Prototype and Test the Fit
The first physical version of a design is often called a toile, muslin, prototype, or sample. It may be made in inexpensive material before the final fabric is used.
This sample allows the designer to check whether the sketch and pattern work on a real body. The team examines the shoulder position, garment length, proportions, movement, volume, and construction.
During a fitting, problems are pinned, marked, photographed, and recorded. The neckline may need reshaping, the sleeve may restrict movement, or the waist may sit lower than expected.
The pattern and technical documents are then updated. Several sample rounds may be necessary before the garment reaches the intended appearance and fit.
Digital product creation can now support this stage through 3D garments and virtual prototypes. These tools allow teams to test colours, materials, patterns, and fit digitally, potentially reducing some physical samples while improving collaboration.
Stage 8: Edit and Finalise the Collection
Designing individual garments is only part of creating a collection. The pieces must also work together.
Designers review the complete range and look for repetition, missing categories, inconsistent colours, or garments that do not support the main concept. A collection may need a balance of statement pieces and more wearable items.
Commercial considerations also become important. The team may estimate material use, labour, manufacturing cost, retail price, and expected customer demand.
Weak designs can be removed, while stronger pieces may receive additional colour options. A collection does not necessarily improve by becoming larger. Careful editing often makes the final message clearer.
The approved garments are prepared for presentation or production. Final specifications, patterns, samples, colours, trims, and quality standards need to be confirmed before larger quantities are made.
Quality-control systems later check factors such as measurements, fabric performance, stitching, and construction consistency.
The basic stages of fashion design take a garment from a rough idea to a complete, wearable product. Research creates direction, mood boards establish the visual story, sketches explore possibilities, and fabrics give the design its physical character.
Technical flats, tech packs, patterns, prototypes, and fittings then transform creativity into something that can be produced accurately. Throughout the process, designers regularly return to earlier stages to correct problems and strengthen the collection.
Start your own fashion design project by choosing one clear theme. Create a small mood board, develop five quick sketches, select your strongest idea, and think about the fabric and construction it would require.
You do not need to design an entire runway collection-the journey can begin with one carefully developed garment.